Before
After
These are 8 steps of doing this job:
Step 1: Duplicate layer (Ctrl+J)
Step2: Filter -> Sharpen -> Unsharp Mask: to make image clearer
- Amount: 75%
- Radius: 1.5 pixels
- Threshold: 0 levels
Step 3: Filter -> Blur -> Surface Blur: to reduce areas which are too clear
- Radius: 10 pixels
- Threshold: 10 levels
Step 4: Modify Level (Ctrl +L): bring back to standard color
Step 5: Brightness / Contrast
- Brightness: +5
- Contrast: -5
Step 6: Color Balance (Depend on your picture)
- Choose Preserver Luminosity
- Choose Shadows with: -29 / +6 / -7 (Cyan / Magenta / Yellow)
- Choose Midtones with: -16 / +11 / -31 (Cyan /
- Magenta / Yellow)
- Choose Hightlight with: -5 / +5 / +5 (Cyan / Magenta / Yellow)
Step 7: Modify Level (Ctrl +L): bring back to standard color
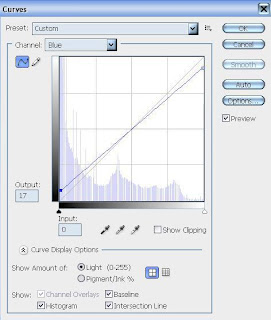
Step 8: Curves (Depend on your picture)


4 comments:
...Nice work! But somethings i want to ask you:
1. Why did you change the flower to green?
2. The shadow is green too. Why did you not let it like the original?
3. The first flower is to bright. Can you reduce it?
..By the way, this is realy nice...Just need to edit a little bit...
I dont really like the new one. The green color, in my opinion, will make the picture worse not better. I suggest that if you wanna emphasize the beauty of the flower just leave it there keep it white >>> the flower is more impressive
oh! it seems to me that you change the real flower to fake ones ^^. Why don't u choose the other color instead of green to make it looks real? However, i like the way that u made the picture by using "sharpen" to provide the clear details for the pic! ^^
It's cool!!! Thanks!
Post a Comment